
Smell that? That is the scent of five-ounce vegetable-tanned hide and fresh cedar shavings. It is the aroma of a workspace that actually means business. When you are deep in the zone, your body becomes a part of the machinery. You need a barrier that understands the physics of a flying spark or a slipped chisel. Mastering the Shop Apron is not just about looking like a professional; it is about the tensile strength required to deflect high-velocity debris while maintaining the flexibility to move with your breath. Most people treat protective gear as an afterthought. I treat it as my primary tool. Leather is a biological polymer with a unique grain direction that offers superior puncture resistance compared to synthetic weaves. It breathes, it molds to your skeletal frame, and it develops a patina that tells the story of every project you have conquered.
THE STUDIO KIT
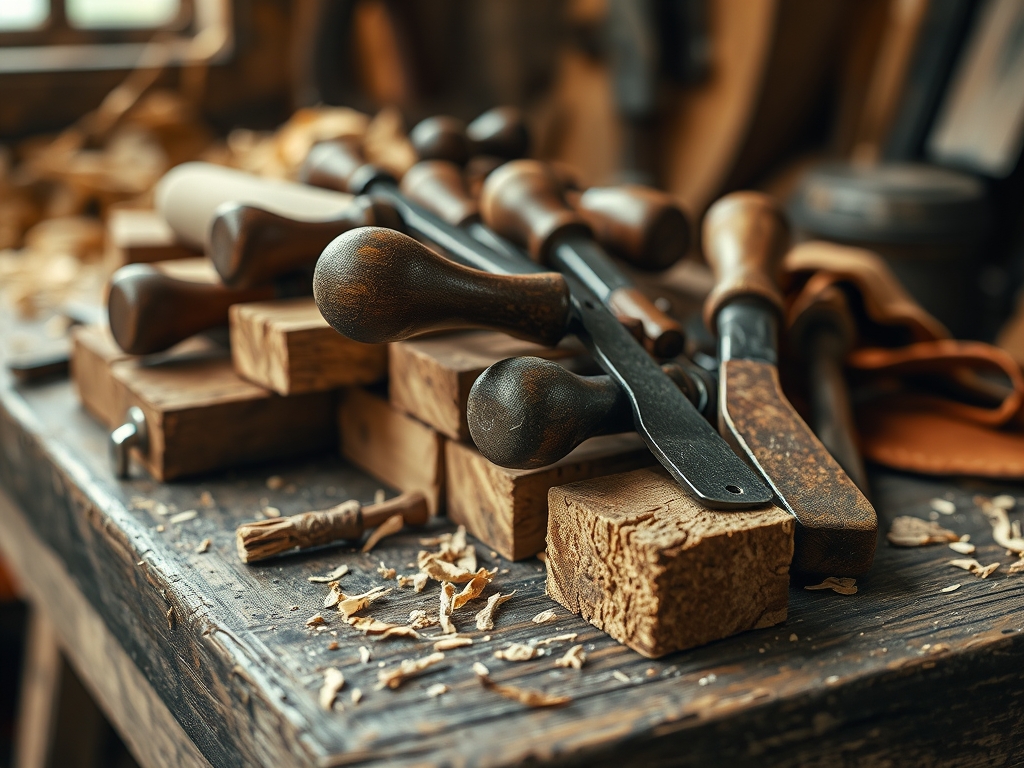
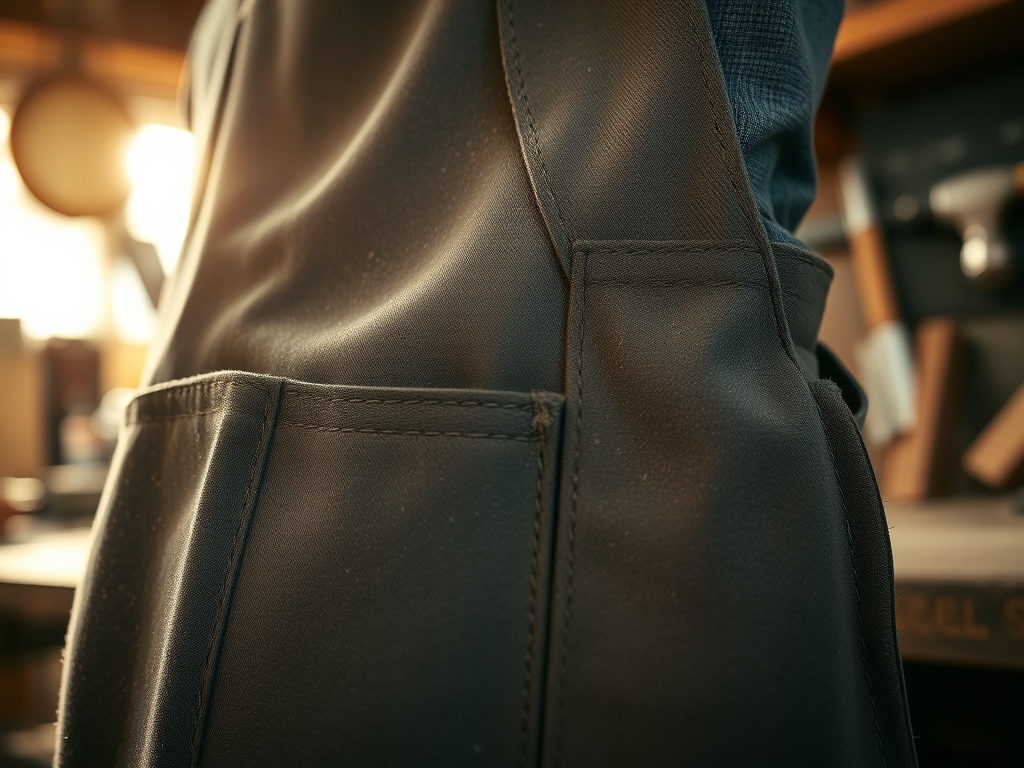
To build a piece of gear that lasts a century, you need to select materials based on their molecular density. I start with a full-grain cowhide, specifically looking for a consistent gauge of 4 to 5 ounces. This thickness provides the perfect balance between weight and protection. You will also need solid brass rivets; brass is non-ferrous, meaning it won't spark if your grinder accidentally kisses it. My toolkit includes a diamond-point awl for piercing, a rotary cutter for those crisp, surgical lines, and a bone folder to compress the leather fibers at the fold lines.
For the hardware, I insist on load-bearing carabiners and 1-inch cotton webbing for the straps. While leather straps look cool, cotton webbing offers better friction coefficients against your clothes, preventing the apron from sliding during heavy movement. If you cannot find premium hide, "Material Substitutions" include heavy-duty 16-ounce waxed canvas. While canvas lacks the abrasion resistance of leather, it offers excellent water repellency and a lighter profile for hot summer studio days. Always use calipers to measure your material thickness before punching holes; even a half-millimeter variance can compromise the structural integrity of a rivet set.
THE TEMPO
The "Maker's Rhythm" is all about respecting the material's response time. You cannot rush a build like this because leather has a memory. If you force a fold before the fibers are ready, you risk grain cracking. I break the project into four distinct phases. Phase one is the Layout and Calibration, taking about ninety minutes of intense focus to ensure the ergonomic symmetry is perfect. Phase two is the Cutting, which requires a slow, steady hand to maintain a constant blade angle.
Phase three is the Hardware Integration, the loudest part of the process where we use a poly mallet to set our anchors. Finally, phase four is the Conditioning. We apply a blend of beeswax and neatsfoot oil, allowing it to penetrate the porous surface for at least six hours. This rhythm ensures that every fiber is saturated and every joint is secure. When you work with the material instead of against it, the result is a piece of gear that feels like a second skin rather than a heavy costume.
THE CORE METHOD
1. Mapping the Topography
We begin by laying the hide flat on a self-healing mat. Use your calipers to mark the center line. We are looking for bilateral symmetry to ensure the weight distributes evenly across your trapezius muscles.
Mastery Tip: Always align your longest cuts with the backbone direction of the hide. This area has the highest fiber density, ensuring the apron won't stretch vertically over years of use.
2. Executing the Primary Cuts
Using a rotary cutter and a steel straightedge, make your long vertical cuts in a single pass. This prevents "stepping" in the leather edge.
Mastery Tip: Maintaining a 90-degree blade pitch is crucial. If the blade tilts, you create a beveled edge that weakens the peripheral integrity of the garment.
3. Edge Burnishing and Friction
Before we add pockets, we must seal the edges. Apply a small amount of tragacanth gum and use a wooden burnisher to rub the edge until it shines.
Mastery Tip: This process uses frictional heat to fuse the loose protein fibers together, creating a waterproof seal that prevents moisture from wicking into the center of the hide via capillary action.
4. Reinforcing Load Points
Every pocket corner needs a rivet. Punch your holes using a drive punch that matches your rivet diameter exactly.
Mastery Tip: We use copper burrs for high-stress areas because copper is malleable. When you peen the rivet, it creates a mechanical bond that relies on compressive force rather than just surface tension.
5. Final Surface Treatment
Massage a high-quality leather balm into the grain using circular motions.
Mastery Tip: The heat from your hands lowers the viscosity of the oils, allowing them to travel deeper into the interstitial spaces between the collagen fibers, keeping the leather supple and resilient.
THE TECHNICAL LEDGER
Maintenance is the difference between a tool and a relic. To ensure longevity, wipe your apron down with a damp microfiber cloth after every session to remove metallic dust or acidic sawdust. Once every six months, re-apply a lipid-rich conditioner to maintain the elasticity of the hide.
Material Variations:
- Sustainable: Cork "leather" is a fantastic vegan alternative with high thermal insulation.
- Recycled: Repurposed welder's leathers offer a pre-broken-in feel with excellent flame resistance.
- Premium: Shell Cordovan accents on tool loops provide incredible durability where tools rub most.
The Correction:
- The Mistake: Rivet is loose or spinning. The Fix: Use a ball-peen hammer to further expand the rivet shank, increasing the radial pressure within the hole.
- The Mistake: Leather feels stiff or "boardy." The Fix: Work the leather over the edge of a workbench to break the fiber bonds mechanically without damaging the grain.
- The Mistake: Uneven dye patches. The Fix: Apply a light coat of isopropyl alcohol to open the pores, then re-apply dye in a circular motion to achieve chromatic uniformity.
Studio Organization: Never hang your apron by a single thin strap; this creates a stress concentration point. Store it flat or on a wide-shouldered hanger in a temperature-controlled environment to prevent atmospheric desiccation.
THE FINAL REVEAL
Look at that! The way the light catches the burnished edges and the heavy brass hardware is pure studio magic. This isn't just an apron; it is a mechanical shield tailored to your specific workflow. It feels heavy in your hands but weightless on your shoulders because the load distribution is mathematically sound. You are now equipped to handle high-torque power tools and razor-sharp hand blades with total confidence. Your studio game just leveled up.
STUDIO QUESTIONS
Why use leather instead of synthetic ballistic nylon?
Leather offers superior puncture resistance and does not melt when exposed to sparks. Synthetics can fuse to your clothing under high heat, whereas leather carbonizes slowly, providing a critical thermal barrier between you and your work.
How do I know if my leather is genuine top-grain?
Check the pore structure under magnification. Genuine leather has an irregular, organic pattern. If you perform a "drop test," the leather should absorb a small amount of water due to its porous nature rather than letting it bead perfectly.
What is the best way to clean chemical spills?
Immediately blot the area to prevent deep-tissue penetration. Use a pH-neutral leather cleaner to neutralize the substance. Avoid aggressive solvents, as they strip the essential lipids from the hide, leading to premature brittleness and cracking.
Can I use a standard sewing machine for this?
Most domestic machines lack the motor torque and needle clearance for five-ounce hide. You need an industrial walking-foot machine or a manual stitching pony with waxed poly-thread to ensure the seams can handle the lateral tension of daily use.

