Imagine the sharp, metallic scent of cold-rolled steel mingling with the sweet, resinous perfume of freshly planed cedar. There is a specific tactile electricity that hums through a studio when every tool sits in its designated shadow; it is the physical manifestation of potential energy. To maintain this flow, a Professional Shop Cleanup is not just a chore but a vital recalibration of your creative engine. When sawdust blankets the floor, it creates a slip hazard that compromises your footing and, by extension, the precision of your cuts. You cannot achieve a perfect tensile bond in your joinery if micro-particulates are contaminating your wood glue. I treat my workspace like a living organism. If the pores of the workbench are clogged with dried finish or metal shavings, the entire system suffocates. We are diving deep into the physics of order today. We will look at how surface tension affects your cleaning solutions and why the molecular stability of your tools depends entirely on how you tuck them in at night. Grab your shop apron; we are turning chaos into a calibrated masterpiece of efficiency.
THE STUDIO KIT

To execute a high-level restoration of your space, you need more than a broom. You need an arsenal designed to handle varying **material densities**. My primary tool is a high-grade **HEPA vacuum** with a brushless motor to prevent ignition when sucking up fine combustible dust. For the surfaces, I use a **magnetic sweeper** to reclaim ferrous fasteners and a **stiff-bristled bench brush** made of horsehair; natural fibers generate less static electricity than synthetic ones, preventing dust from clinging to the brush itself. For deep cleaning, I keep a bottle of **isopropyl alcohol (99 percent)** to dissolve oils without raising the grain of my wooden worktops.
Material Substitutions: If you lack a magnetic sweeper, a neodymium magnet inside a plastic bag works perfectly to catch stray pins or screws. Instead of expensive shop rags, use lint-free huck towels reclaimed from surgical supply outlets; their tight weave prevents snagging on rough-sawn lumber. For delicate instrument cleaning, a compressed air canister is standard, but a manual silicone bulb blower offers more control for clearing debris from a jeweler's saw or calipers.
THE TEMPO
The "Maker's Rhythm" is a three-act play that dictates the longevity of your equipment. I break my cleanup into the Daily Reset (15 minutes), the Weekly Calibration (1 hour), and the Monthly Deep Purge (4 hours). The Daily Reset focuses on clearing the immediate work envelope to prevent tool-on-tool abrasion. The Weekly Calibration is where the science happens; this is when I check the planarity of my workbench and oil any exposed carbon steel to prevent oxidation. The Monthly Purge involves a total inventory check to ensure that plywood offcuts are not warping due to improper vertical storage. Respecting this tempo ensures that you never start a project by fighting your environment.
THE CORE METHOD
1. The Vertical Descent
We start at the highest point of the studio and work down. Gravity is our primary assistant here. Use a microfiber duster or low-pressure air to clear the tops of cabinets and light fixtures. This prevents "phantom dust" from settling on your wet finishes later. By moving top-to-bottom, you ensure that particulates are concentrated on the floor for a single final sweep.
Mastery Tip: This method utilizes gravitational sedimentation. Fine particles have a low settling velocity; by starting high, you allow the smallest microns of dust to reach the floor before you begin your final vacuuming pass, ensuring a truly sterile environment for finishing.
2. Solvent De-greasing and Surface Tension
Clear your primary workbench and apply a light mist of your cleaning agent. I prefer a pH-neutral solution for finished surfaces. Use a scuff pad to break the surface tension of any dried adhesives or resin drips. Wipe in the direction of the wood grain to prevent cross-grain scratching, which can harbor bacteria or moisture.
Mastery Tip: Understanding capillary action is key here. If you leave liquid cleaners on a porous wooden surface too long, the fibers will wick the moisture deep into the cellular structure, causing the wood to swell or "fur." Always wipe dry immediately to maintain the dimensional stability of your bench.
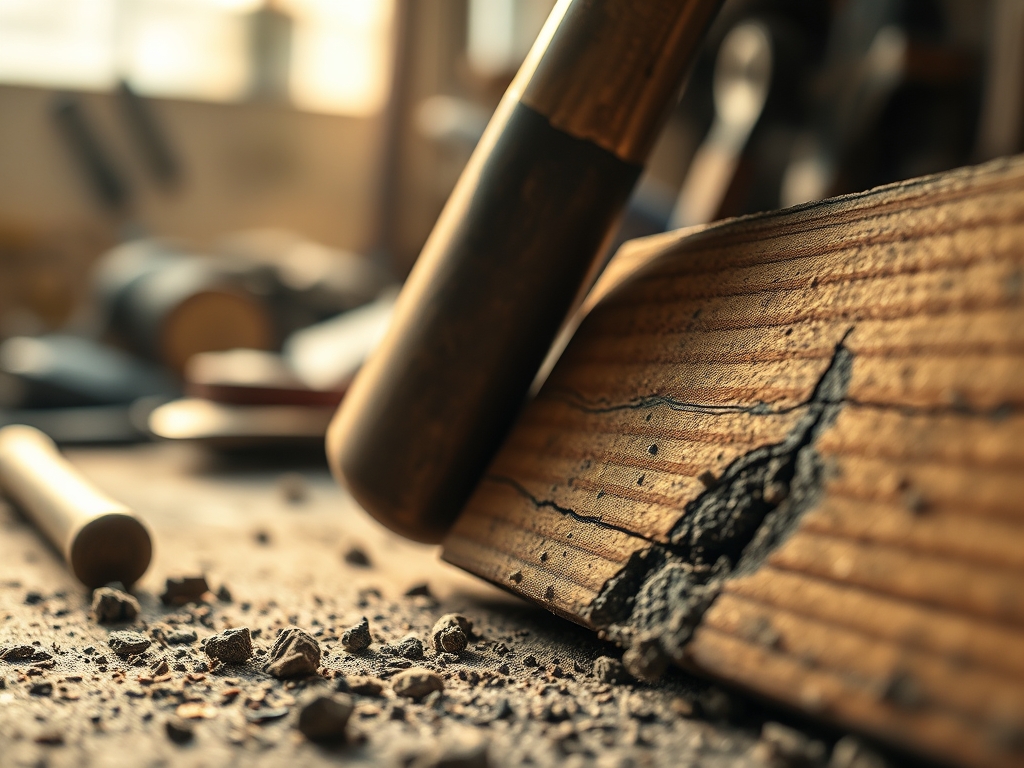
3. Tool Honing and Oxidation Barriers
Every tool that touched your hands today has absorbed skin oils, which are acidic. Wipe down your chisels, awls, and planes with a cloth dampened with camellia oil or a dry PTFE lubricant. This creates a microscopic hydrophobic barrier that prevents oxygen from reaching the metal surface and initiating the rusting process.
Mastery Tip: This step addresses galvanic corrosion. When two different metals touch in a humid shop, or when salt from your sweat sits on carbon steel, an electrochemical reaction occurs. The oil barrier interrupts this circuit, preserving the Vickers hardness of your cutting edges.
4. The Floor Reclamation
The final stage is the floor. Use the magnetic sweeper first, then the HEPA vacuum. Avoid using a traditional broom for fine dust as it simply aerosolizes the particles, allowing them to settle back onto your clean tools and into your lungs. Once the floor is clear, check for any "soft spots" or cracks in the concrete that might indicate moisture intrusion.
Mastery Tip: This is about frictional coefficients. A dusty floor has a much lower coefficient of friction, making it "fast" and dangerous. A truly clean shop floor provides the necessary grip for your work boots, allowing you to put your full weight into a burnishing or sawing motion safely.
THE TECHNICAL LEDGER
Maintenance & Longevity: To keep your shop in peak condition, calibrate your precision squares and digital calipers every six months using a granite surface plate. Check the tension on your bandsaw blades; leaving them under high tensile stress while idle can lead to metal fatigue and premature snapping.
Material Variations: If you work primarily with premium hardwoods, maintain a humidity level of 40 to 50 percent to prevent checking. For those using recycled plastics or resins, ensure your vacuum system has a static grounding wire, as plastic shavings are highly prone to static buildup and can "jump" out of collection bins.
The Correction:
- The Sticky Workbench: If your bench feels tacky, you likely used a wax-based cleaner over a polyurethane finish. Fix this by wiping with mineral spirits to strip the wax without harming the base coat.
- The Rusty Pliers: If a tool has developed surface rust, do not grind it. Use a chemical rust converter or a soak in evaporated milk (citric acid) to gently lift the oxidation without changing the tool's gauge.
- The Clogged Vacuum: If suction drops, your filter is likely blinded by fine dust. Tap it out inside a bag, or replace it. Never wash a paper HEPA filter; the water collapses the fibrous matrix and ruins its filtration rating.
Studio Organization: Store your materials based on weight distribution. Heavy sheet goods should be stored vertically with at least three points of contact to prevent bowing. Small hardware should be kept in transparent, airtight bins to prevent humidity from reaching the metal and to allow for instant visual inventory.
THE FINAL REVEAL
There is nothing quite like the sight of a fully reset studio. The light bounces off the polished steel of your rotary cutter; the workbench is a vast, open landscape of potential; the air is crisp and free of floating debris. This level of Professional Shop Cleanup transforms your workspace from a cluttered room into a high-performance laboratory. You are no longer fighting your tools; you are dancing with them. When you walk in tomorrow morning, you won't spend twenty minutes looking for your bone folder or clearing a space to work. You will simply pick up your materials and begin. That clarity of mind is the greatest tool in your kit.
STUDIO QUESTIONS
How often should I deep clean my power tools?
Perform a deep clean every 20 hours of runtime. Focus on clearing the motor housing of dust to prevent thermal buildup. Check the brushes for wear and ensure all collets are free of resin to maintain grip.
What is the best way to store sandpaper?
Store sandpaper flat in a climate-controlled environment. High humidity softens the adhesive bond between the grit and the backing; low humidity makes the paper brittle. Use a labeled accordion file to organize by grit sequence for efficiency.
Can I use a regular vacuum for shop dust?
No; standard household vacuums lack the filtration to trap fine particulate matter. They often exhaust the smallest, most dangerous dust back into the air. Use a vacuum with a HEPA-rated filter and a high CFM rating.
How do I prevent my hand tools from rusting?
Apply a thin layer of paste wax or camellia oil to all metal surfaces. Store tools in a drawer lined with VCI (Volatile Corrosion Inhibitor) paper. This creates a protective atmosphere that prevents moisture from reacting with the steel.